Adobe Scan (free) allows the user to quickly scan handwritten or printed documents in order to create and share PDFs with others.
STEP 1: Download and Install the App
- After downloading Adobe Scan from your online mobile marketplace and installing it, open the app up. You will need to sign in to the application with your preferred method.

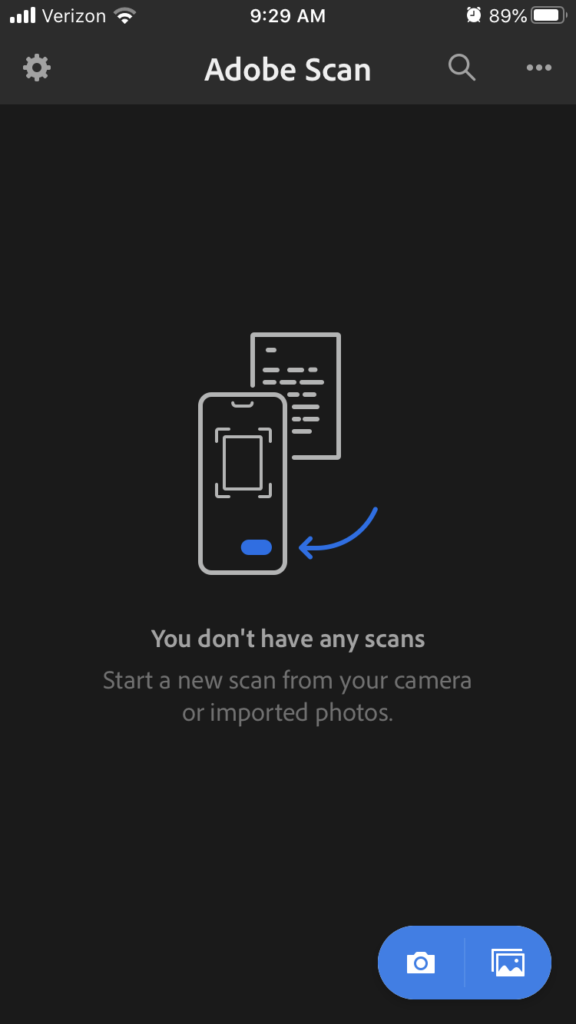
- Once you are logged in, you should see your home page in the application. In order to start scanning, select the left blue camera icon at the bottom of the screen. You may also select the blue photo icon on the right to browse your photo gallery.
STEP 2: Scan One or More Pages
- Point your mobile device’s camera at the document you wish to scan. The application may prompt you to tap the screen when you are ready for it to start looking for the document borders.

- The application will take a second to find the borders of your document before taking a snapshot. Once it has done so, press the “Continue” button. Adobe Scan will save that snapshot at the bottom of the screen. You may either continue scanning from here, or select the image at the bottom right hand corner to generate your PDF.

- If you wish to continue scanning because you have a multi page document, simply point the camera on your mobile device at the next page, and repeat the process. When finished, click on the document image at the bottom right of the screen.
- The Adobe Scan editor will allow you to make small adjustments to your document before you save it. You can rotate the image if you need to, crop it, or clean up any creases or other blemishes that you do not wish to include in your finished PDF. Once you are ready to export, click on the “Save PDF” button at the top right of the screen. This will save the PDF in your Adobe account cloud, and will be accessible through the application.

- You should now see your scanned PDF on your home screen. Here, you can add comments to the document through Adobe Acrobat (assuming it is installed separately on your mobile device,) view the document, or send it to another party. If you wish to share the document with someone else, click on the “Share” button next to the document.

STEP 3: Upload to Moodle
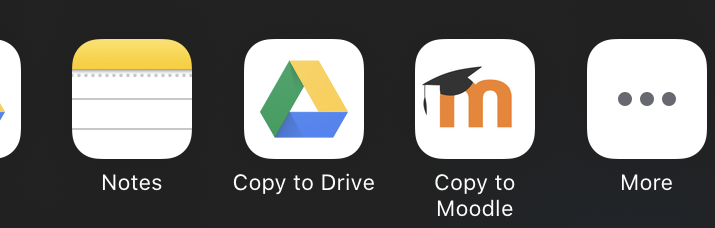
- You have three options for sharing your document. “Share Link” will copy a sharable link you can send to people that will give them access to your PDF on Adobe’s website. “Email” will similarly send an email with a share link through your mail application of choice on your mobile device. “Share a Copy” will share an actual PDF copy of the file directly with a person or application. This is likely the ideal solution for students and faculty, as it removes the need for your recipient to download the file from Adobe’s servers.

- In order to upload the PDF to Moodle for an assignment, select “Share a Copy.”
- On iOs, scroll through your applications and select Moodle. This will upload the file to your mobile Moodle application. If you do not have the Moodle App, you can download that to your mobile device as well.
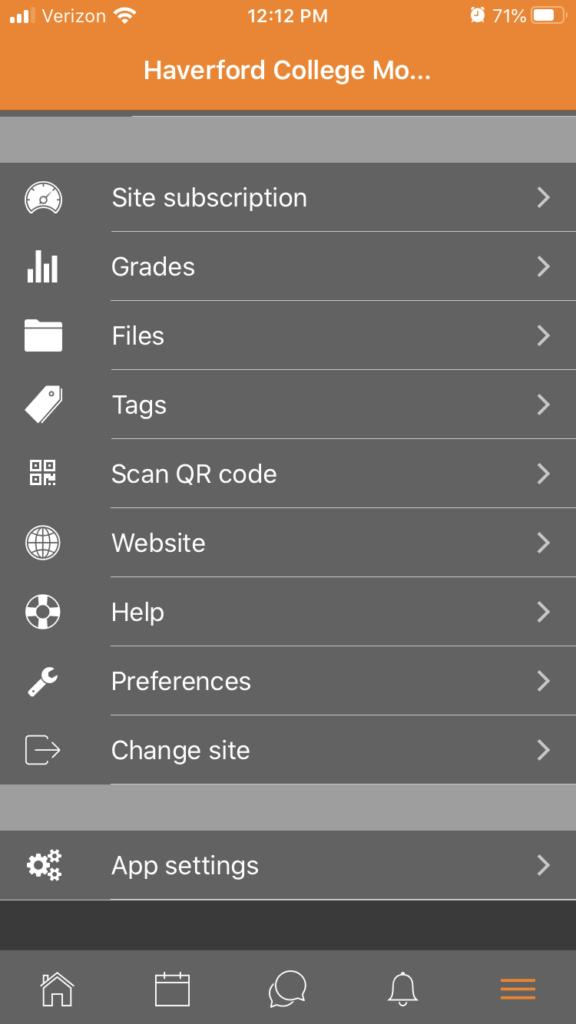
- In the Moodle app, select the menu icon at the bottom right side of the screen, and navigate to “Files”
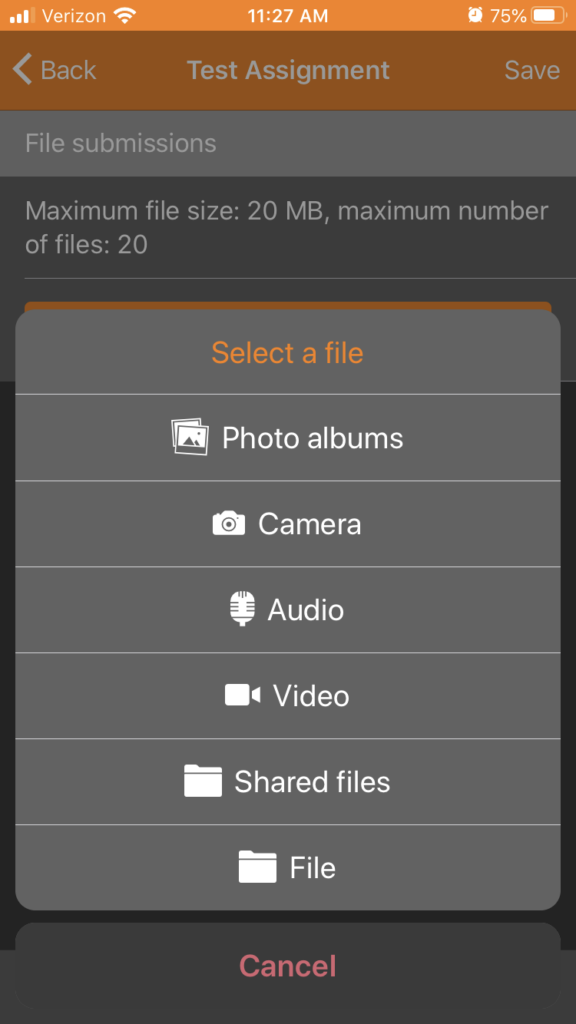
- Click the large circular “+” button to add a file.
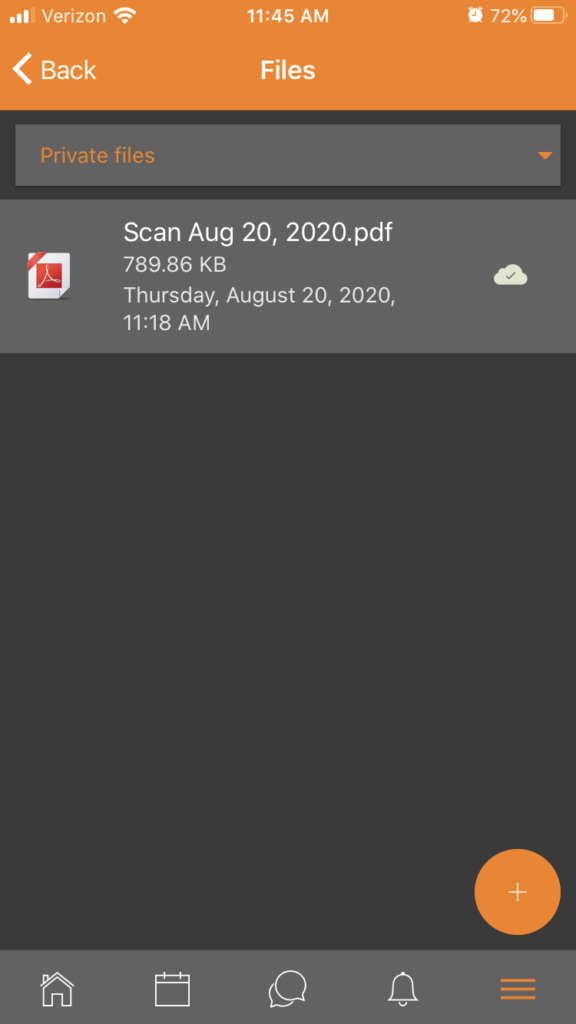
- Select “Shared Files.” You should see your uploaded scan as one of the options to upload. Select the PDF to import it to your file library within the app.
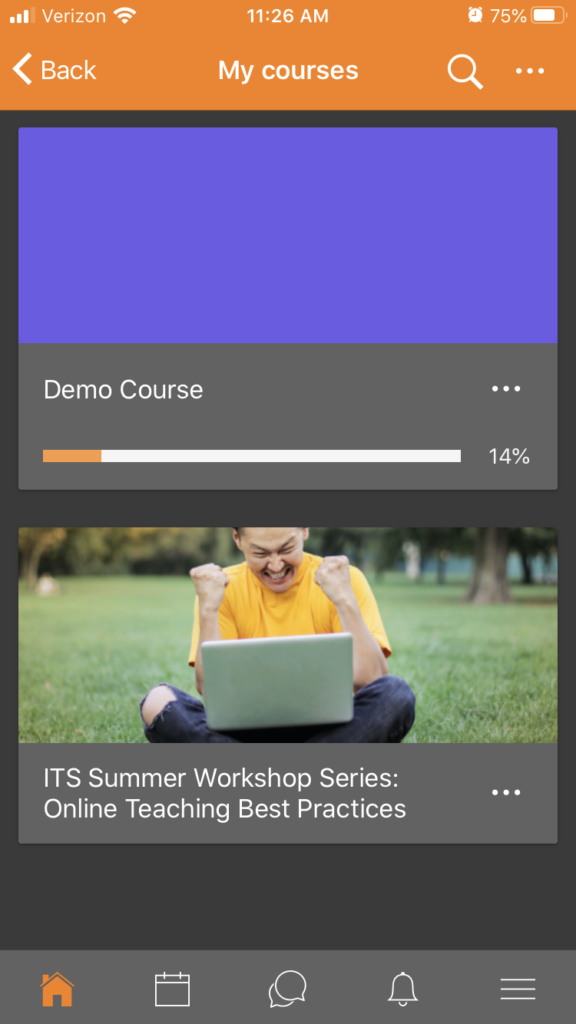
- From the Moodle home menu on the mobile application, select the course you are submitting your document to as an assignment.
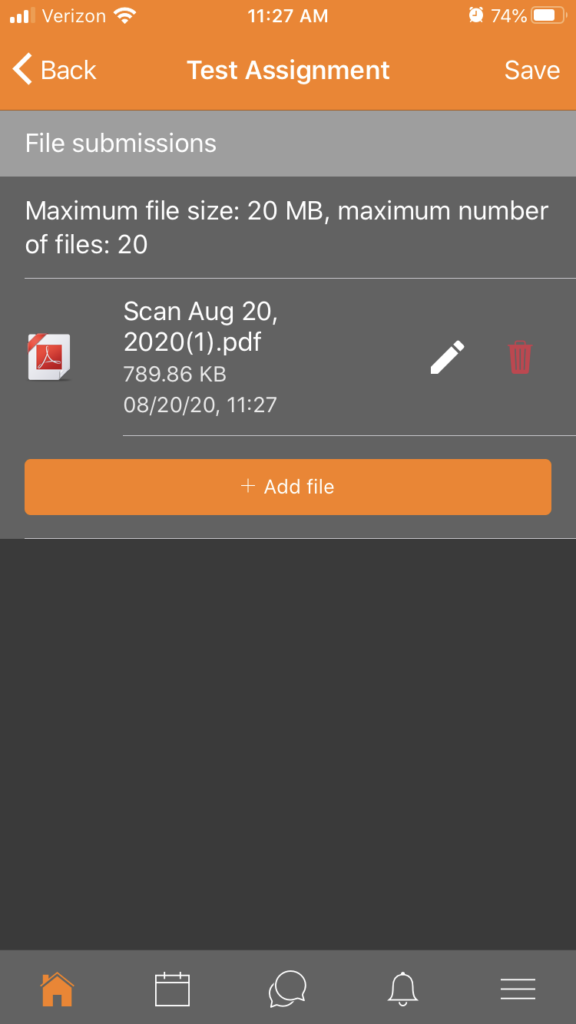
- Navigate to your assignment, and click on “Add file”

- Select your uploaded PDF from your files. Once selected, click “Save” at the top right part of the screen.
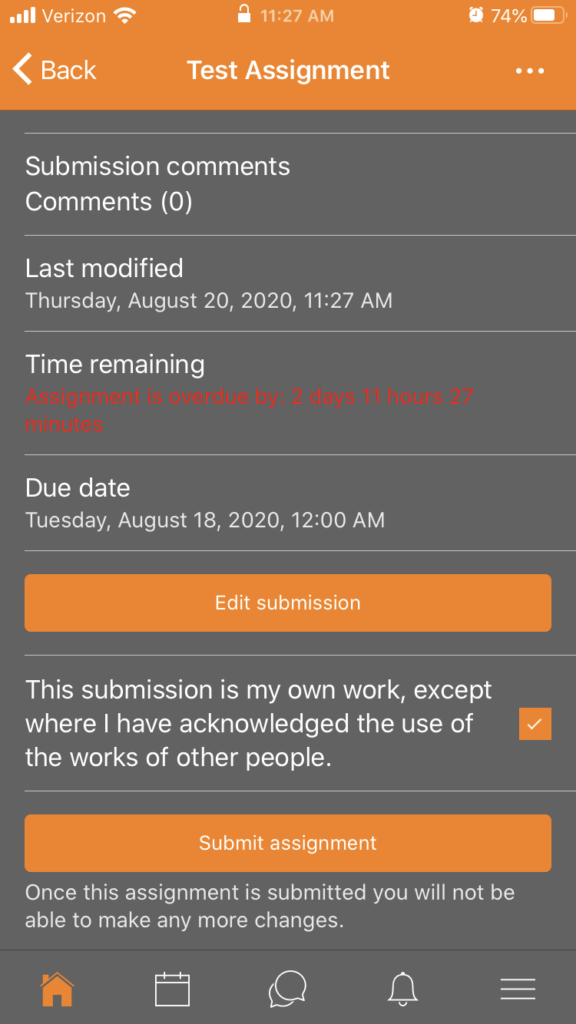
- Make sure you check the box that certifies the contents of the document belong to you, then click on “Submit assignment” to finish your submission.
Here are additional notes and documentation on Adobe Scan.
If you have any further questions about this program, please contact: hc-techlearn@haverford.edu.
Leave a comment